Can a Bike Rack Damage My Car? Here's how to Protect it!

I spent eight and a half years on the REI sales floor, and I can tell you — the number one question I got from customers walking into the bike rack aisle wasn't "which one is fastest to install?" It was "is this thing going to mess up my car?"
Fair question. Because honestly? Yes, a bike rack can damage your car. I've seen it happen more times than I'd like to admit — scratched paint, dented trunks, cracked tail lights, even a warped roof rail from a rack that was never meant for that vehicle. But here's the thing most people don't hear: the damage almost always comes down to one of three fixable problems. Wrong rack type for the car. Sloppy installation. Or just forgetting the rack is up there (we'll get to that garage door story in a minute).
The good news is that rack design has come a long way, especially in the last couple of years. Manufacturers are finally catching up to what we heard customers asking for on the floor — better padding, anti-sway tech, and frames built to handle the heavier e-bikes that everyone's buying now. So let's walk through what actually causes damage, which rack styles are the biggest offenders, and how to keep your car looking like it did before you became a bike family.
The Real Damage Risks, Rack by Rack
Not all bike racks carry the same risk to your vehicle, and this is something I wish more people understood before purchasing. If you're still figuring out which style is right for you, I wrote a full breakdown of the five main types of bike racks — but here's what I saw from the damage and returns side of things.
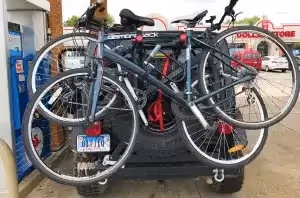
Trunk-Mount Racks: The Biggest Paint Offenders
I'm going to be blunt — trunk-mount racks were our number one source of damage complaints at REI. Not even close. Customers would come back with scratched paint, scuffed clear coat, and sometimes actual dents where the rack hooks gripped the trunk lip. The rubber pads that come with most trunk racks look reassuring in the box, but after a few highway trips and some vibration, they shift. And once metal meets paint, it's over.
The people most at risk? Honestly, it was often families trying to save money. I get it — trunk racks are the most affordable entry point, and when you're already spending on bikes for the kids, dropping $400+ on a hitch rack feels brutal. But I watched the same pattern repeat for years: customer buys a $79 trunk rack, comes back three months later upset about paint damage, and ends up buying a hitch rack anyway. That cheap rack just cost them a $300 touch-up job plus the price of the upgrade.
If you do go the trunk-mount route, check out my picks for the best trunk-mount racks — I specifically focused on models with better padding systems and more stable attachment. But even the good ones need you to check the contact points every single time you load up.
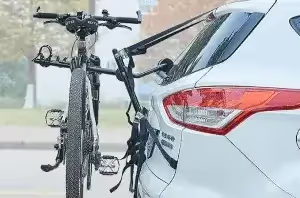
Hitch-Mount Racks: The Safer Bet (With One Big Caveat)
Hitch racks were always what I steered families toward, especially anyone with more than one bike to haul. The weight sits on the hitch receiver instead of your paint, which eliminates most of the surface damage risk right away.
But here's what customers didn't realize until it was too late: hitch wobble is real, and it causes bumper damage. That little bit of play between the rack and the receiver adds up over miles of highway driving. The bikes sway, the rack tilts, and the closest bike starts kissing your bumper or hatch. I saw a customer's Subaru Outback with a perfect bike-tire-shaped scuff on the bumper — she had no idea it was happening until she unloaded at the trailhead.
The fix is an anti-wobble hitch pin or an anti-rattle device. They cost $15-25 and they're worth every penny. In 2025 and 2026, several rack brands — Kuat, 1Up, Saris — have started building tighter receiver tolerances and integrated anti-wobble systems into their newer models. That's a direct response to years of exactly this complaint. If you're buying new this year, look for racks that advertise "wobble-free" or "tight-fit" hitch connections. It's not just marketing fluff anymore; the engineering has actually improved.
Roof Racks: The Garage Door Killer
Okay, story time. A guy came into our store — nice guy, clearly embarrassed — holding a mangled roof-mount tray that looked like it had been through a trash compactor. He'd pulled into his garage with two bikes on the roof. Peeled the rain gutters halfway off his car, destroyed both bikes, and gouged a line across the top of the garage door frame. Total damage was somewhere north of $2,000.
He is not alone. This happens constantly. Roof racks are fantastic for keeping your rear cargo access clear, and they cause zero paint damage to trunks or bumpers. But the vertical clearance issue is the silent risk nobody thinks about until they hear that horrible scraping sound. Drive-throughs, parking garages, your own garage — all potential disasters.
My practical tip: put a sticky note on your dashboard or a bright-colored ribbon on your steering wheel every time you load bikes on the roof. It sounds low-tech and silly. It works. Some of the newer GPS-connected rack systems from Thule will actually send your phone an alert if you're approaching a low clearance, which is genuinely cool technology, but a $0.10 sticky note has the same success rate.
The other roof rack issue is loading scratches. Hoisting a bike above your head and sliding it onto a tray mount means your pedals, handlebars, and chain are all hovering inches from your roof paint. If you've got a shorter vehicle, it's manageable. If you're loading onto a tall SUV? You're basically doing an overhead press with a greasy, pokey machine. I've loaded bikes onto our roof rack while holding my daughter on my hip because she was mid-meltdown and my husband was still inside the coffee shop, and I can confirm — that is how scratches happen.
Spare Tire-Mount Racks: A Niche Risk
These are less common, but if you drive a Jeep or an older SUV with a rear-mounted spare, you've probably considered one. The main risk here is stress on the spare tire mount itself. Two heavy bikes bouncing on the highway put a lot of lever force on hardware that was designed to hold one tire. I've seen loosened bolts, cracked mounting brackets, and in one case, the whole assembly sagging visibly after a summer of use. Check your spare tire mount's weight rating before you commit, and inspect the bolts frequently.
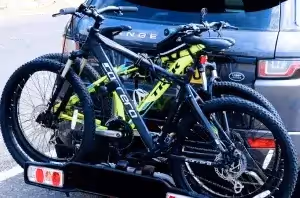
The E-Bike Problem Nobody Warned You About
This is the section I really want people to read, because e-bike weight is causing a wave of rack-related car damage that the industry is still catching up to.
A standard road bike weighs 18-22 pounds. A typical mountain bike, maybe 28-32. Your average e-bike? 50 to 70 pounds. Some of the cargo e-bikes families are buying now push 75-80 pounds. That's a massive difference, and most bike racks on the market were not designed for it.
At REI, we started seeing this around 2022-2023 and it only accelerated. Customers would buy a rack rated for "two bikes, 60-pound capacity," load two e-bikes totaling 120 pounds, and wonder why the rack was sagging, wobbling, or pulling away from the vehicle. I watched a hitch rack physically bend under two heavy e-MTBs during a demo event. The hitch receiver was fine — the rack arms just weren't built for that load.
Here's what you need to know in 2026:
- Always check the per-bike weight limit, not just the total capacity. A rack rated for "4 bikes, 120 lbs" might only support 35 lbs per tray — that won't hold a single e-bike safely.
- Look for e-bike-specific racks or "heavy-duty" models. Brands like 1Up, Kuat, and Hollywood Racks now make platforms rated for 60-70 lbs per bike. They cost more — expect to spend $450-700 — but the alternative is a cracked bumper or worse. (Wondering about the price range? Here's my breakdown of what bike racks actually cost across all styles.)
- Hitch racks are really your only safe option for e-bikes. Please don't try to roof-mount a 65-pound e-bike. Your back and your car will both regret it. And trunk-mount racks absolutely cannot handle e-bike weight safely.
- Upgrade your hitch receiver if needed. A Class I hitch (1.25") with a 200-lb tongue weight is cutting it close with two e-bikes plus the rack itself. A Class II or III with a 2" receiver gives you real margin.
How to Actually Prevent Damage: The Stuff That Works
I've boiled this down to the habits that actually make a difference versus the advice that sounds good in a manual but nobody follows.
1. Get the Installation Right the First Time
Read the instructions. I know — groundbreaking advice. But I'm serious. The number of customers who came back with damage that traced directly back to skipped installation steps was staggering. If you're not confident, take it to a bike shop or a hitch installer. The $30-50 for professional installation is cheap insurance against a $500 paint repair.
For hitch racks: make sure the rack is fully seated in the receiver and the pin is secure. Give it a firm shake before every drive. For trunk racks: every hook, every strap, every contact pad needs to be exactly where the instructions say. "Close enough" is how paint gets scratched.
2. Use Protective Padding (Even If Your Rack Comes With Some)
The foam pads and rubber guards that come with racks are a starting point, not a solution. They compress over time, shift in heat, and wear out. I keep a stash of adhesive felt pads and microfiber cloths to add extra protection at every contact point. A $5 pack of furniture felt pads from the hardware store has saved more paint than any expensive accessory I've bought.
In 2026, several newer rack models come with upgraded rubberized polymer contact points that hold up significantly better than the old foam — Thule's EasyFold XT3 and Kuat's Piston Pro X both use materials that resist compression and won't slide. If you're buying new, these details matter more than you'd think.
3. The Pre-Drive Shake Test
Before every single drive, grab the rack and the bikes and shake them firmly. Side to side, up and down. Anything that moves will move more at 65 mph. This takes ten seconds and it's the single best habit you can build. I do it even when I'm running late, even when the kids are screaming, even when it's raining. Ten seconds.
4. Remove the Rack When You're Not Using It
I know it's a hassle. I know you'll be biking again next weekend. But leaving a rack on your car 24/7 increases exposure to vibration, weather, UV degradation, and the general loosening that comes from daily driving. Hitch racks are heavy. Trunk racks put constant pressure on their contact points. Roof racks add wind resistance and noise that wears on the mounting hardware.
The racks that are easiest to take on and off are the ones you'll actually remove. This is worth considering at purchase time — a slightly more expensive rack with a quick-release system pays for itself in reduced wear. Also worth noting: keeping your rack on when it's empty might actually cause you legal headaches in some areas. I dug into that in my article on whether your bike rack setup is actually legal.
5. Clean the Contact Points Regularly
Dirt and grit get trapped between the rack and your car. Then every bump in the road turns those particles into tiny pieces of sandpaper grinding against your paint. Once a month — or after any dusty or muddy trip — wipe down everywhere the rack touches your vehicle. Quick detail spray and a microfiber cloth. Two minutes.
The Honest Bottom Line on Cost vs. Risk
Here's the conversation I had with families at REI probably a thousand times: "Can I get something cheaper that won't wreck my car?" And my honest answer was always the same — you can spend a little more now on a quality rack with good vehicle protection, or you can spend a lot more later on paint repair and a replacement rack.
Budget trunk racks under $75 almost always caused problems. Mid-range hitch racks in the $250-400 range hit the sweet spot for most families hauling standard bikes. And if you've got e-bikes or more than two bikes, plan on $450-700 for something that won't stress your vehicle.
The most expensive part of a bike rack is the damage from the wrong one.
Your Quick-Reference Protection Checklist
- Match your rack type to your vehicle, your bikes, and your actual weight needs — especially if you own e-bikes
- Follow installation instructions completely; pay for professional install if you're unsure
- Add extra protective padding at every contact point between rack and car
- Do the ten-second shake test before every single drive
- Remove the rack when it's not in use
- Clean contact points monthly and inspect hardware for wear
- Invest in an anti-wobble device for any hitch-mount rack
- Put a dashboard reminder any time bikes are on the roof
Your car and your bikes can absolutely coexist without damage — it just takes the right equipment and a few good habits. I've hauled bikes to trailheads, triathlons, and family campgrounds across Colorado for years, and my car's paint is no worse for it. The key is starting with the right rack for your setup and then actually doing the small maintenance stuff that takes less time than making a cup of coffee.
Now go ride.