2026's Best Roof Racks for Your Pop-Up Camper Adventure!
I installed my first roof rack on a pop-up camper in 2008. A Jayco 1207. I drilled holes in the roof, slapped on some universal crossbars, and loaded kayaks on top like I knew what I was doing. I didn't. The roof flexed so badly at highway speed that I pulled over after ten miles and unloaded everything at a gas station.
Pop-up camper roofs are not car roofs. They're thin fiberglass or aluminum panels designed to lift, fold, and seal against weather. They were never engineered to carry heavy loads while moving down the highway at 65 mph. But with the right rack system and realistic expectations about weight limits, you can safely haul gear up there. I've been doing it successfully for years since that first disaster.
Dynamic vs. Static Load Limits: The Critical Distinction
This is where most people get into trouble. Your pop-up camper roof has two very different weight ratings, and confusing them will ruin your day.
Static load limit: how much weight the roof can support when the camper is parked and the roof is in the raised position. This is usually 150-300 lbs depending on the model. It's meant for things like AC units, solar panels, and the occasional person sitting up there to do maintenance.
Dynamic load limit: how much weight the roof can support while driving. This number is almost always lower — sometimes dramatically lower. Many pop-up camper manufacturers don't even publish a dynamic load rating because the roofs weren't designed for it.
When they don't publish it, I use a conservative rule: assume the dynamic limit is 40-50% of the static limit. So a roof rated for 200 lbs static gets treated as an 80-100 lb dynamic limit. That's including the rack itself.
Subtract 20-40 lbs for the rack hardware. You're left with 40-80 lbs of actual cargo you can carry while driving. That's not nothing — it's a couple of kayaks, a small cargo box, or a few bags of soft gear. But it's not a rooftop tent and a full gear loadout.
Three Mounting Approaches
1. Drill-Mount Systems
The most secure option and the one I use now. Bolts pass through the roof panel into reinforced backing plates on the underside. When done right, it's as solid as a factory roof rack on a car.
"But I don't want to drill holes in my camper roof." I get it. But here's the reality: a properly installed drill-mount system with butyl tape sealant and stainless hardware is watertight. I've had mine through four years of Pacific Northwest rain without a single leak. The holes are sealed better than the factory seams.
The key: you need to know where the structural supports are inside the roof. Drill into unsupported fiberglass and you'll crack the panel. Most pop-up roofs have aluminum or wood reinforcements at specific points. Get the manufacturer's spec sheet or crawl inside with a flashlight and knock on the roof to find the solid spots. I mark them with blue tape from the outside, then drill on the tape marks.
For backing plates, I use 3-inch square stainless steel plates with neoprene washers. Oversized backing plates spread the load. Undersized ones will pull through the roof liner over time. Ask me how I know.
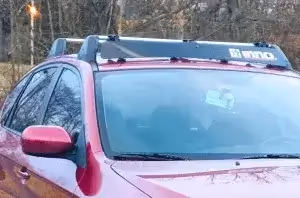
2. Rail-Mount / Clamp-On Systems
If your pop-up has factory drip rails or gutters along the roof edges, you can clamp crossbars onto them without drilling. Yakima and Thule both make gutter-mount feet that work on some pop-up camper profiles.
The advantage is obvious: no holes. The disadvantage is also obvious: clamps can shift, and the load is concentrated on the gutter edges rather than distributed across structural points. I've seen gutter-mount racks bend drip rails on pop-ups that had thin aluminum gutters. Older Coleman and Fleetwood models are especially vulnerable.
If you go this route, test the setup aggressively before a long trip. Load it up, drive 50 miles on a rough road, and check every connection point. If anything has shifted, rethink your approach.
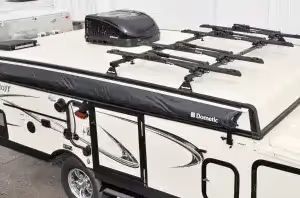
3. Track-Mount Systems
Some newer pop-up campers come with factory-installed tracks on the roof, similar to what you'd see on a full-size RV. If you have these, use them. They're the best of both worlds — bolted to structural points by the factory, designed for rack attachment, and no drilling required on your end.
Unfortunately, most pop-ups on the road don't have them. It's mainly a feature on 2022+ models from a few manufacturers. If you're shopping for a new pop-up and plan to use a roof rack, prioritize models with factory tracks. It'll save you hours of installation work and second-guessing.
Weight Distribution Matters More Than Total Weight
A pop-up camper roof is essentially a shallow, flat panel. It doesn't have the complex stamped-steel structure of a car roof. Forces don't distribute the same way.
Center the load between the crossbars. Weight hanging past the front or rear bar creates a rocking moment that amplifies every bump. I've watched a poorly loaded kayak bounce a crossbar clean off a clamp mount at 55 mph. The kayak survived. The clamp didn't.
Spread the crossbars as wide as your mounting points allow. Two bars 48 inches apart are dramatically more stable than two bars 24 inches apart. If you can fit three bars, even better. Three bars on my current setup turned a sketchy feeling load into a rock-solid one.
Soft gear goes on the roof. Heavy gear goes inside. I see people strap their heaviest items up top to save interior space. The high center of gravity makes the tow vehicle sway. Your camper is already a sail in crosswinds. Don't make it worse.
What Actually Works Up There
Based on years of trial and error, here's what I'll put on a pop-up roof rack and what I won't:
Good candidates:
- Kayaks and canoes (light relative to their size, aerodynamic when loaded right)
- Soft cargo bags under 50 lbs total
- Solar panels (light and flat — ideal roof cargo)
- Small cargo baskets with light gear — camp chairs, sleeping pads, tarps
Bad candidates:
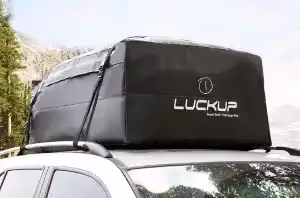
- Hardshell cargo boxes (heavy, high-profile, catch crosswinds)
- Rooftop tents (too heavy for most pop-up roofs by a wide margin)
- Lumber, heavy tools, or dense gear
- Anything over 100 lbs total including rack weight
My Current Setup
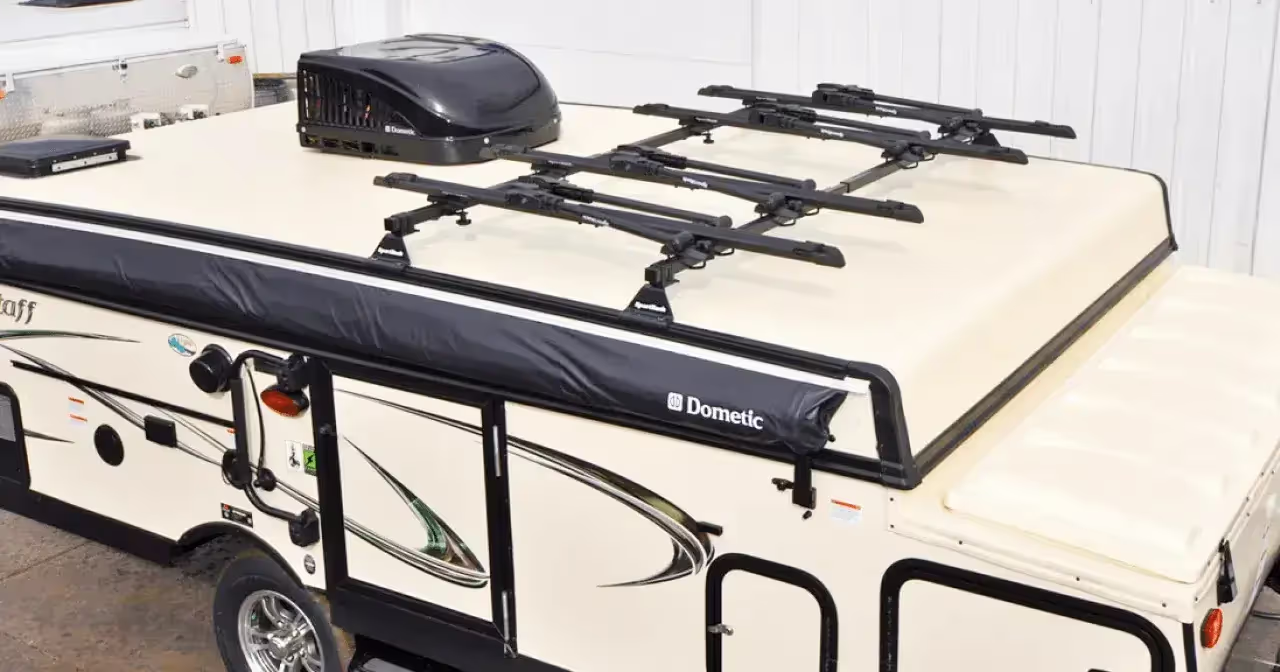
I'm running a 2019 Flagstaff 228 with a drill-mount Yakima system. Two HD crossbars spaced 44 inches apart, mounted into reinforced points I confirmed with the manufacturer's diagram. Total rack weight: 22 lbs. That gives me roughly 75 lbs of usable capacity based on my conservative dynamic load estimate.
I typically carry two sit-on-top kayaks (28 lbs each) with J-cradle mounts. That puts me right at my limit, and the rig handles fine at highway speeds. Crosswind days require attention, but it's manageable.
The install took about four hours including finding the structural points, drilling, sealing, and mounting. I used butyl tape under every mounting foot, stainless bolts, and oversized backing plates inside. After four years, zero leaks, zero issues.
Rack Recommendations for Pop-Up Campers in 2026
I don't recommend specific rack "kits" for pop-ups because there's no universal fit. Instead, here's the component approach that works:
- Crossbars: Yakima HD bars or Thule SquareBar Evo. Both are strong relative to weight and widely compatible with accessories. Round bars work too but limit your accessory options.
- Mounting feet: For drill-mount, Yakima SkyLine towers or Thule Evo Fixpoint. For gutter-mount, Yakima RailGrab or Thule Evo Raised Rail.
- Sealant: Butyl tape, not silicone. Butyl stays flexible and maintains its seal through thermal cycling. Silicone eventually cracks on a surface that moves.
- Hardware: Stainless steel only. Your camper roof is exposed to weather constantly. Zinc-plated bolts will rust within a season.
Budget for the whole setup: $300-500 for quality components. Yes, that's real money. But quality rack systems cost what they cost for good reason, and your camper roof is not the place to cut corners with budget hardware.
Pop-up camper roof racks work. I'm proof. But they work within tight limits, and respecting those limits is the difference between a great trip and a roadside disaster.
Know your dynamic load limit. Mount into structure, not just fiberglass. Distribute weight evenly. And keep total cargo weight realistic — this is a pop-up camper roof, not a truck bed.
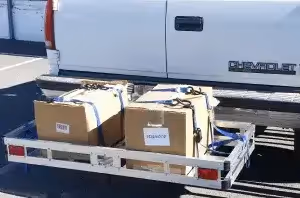
If you're finding that your roof rack capacity isn't enough for your gear, consider a hitch-mounted cargo carrier as a supplement. Between roof and hitch, you can carry a surprising amount of gear without towing a trailer.
If you've done a pop-up roof rack install, I'd love to see your setup. Especially if you found structural mounting points on a model I haven't worked with. Drop a comment or send photos — I'll add useful info to this article with credit.
---